2022 Adobe Camera Raw Updates
The last update from Adobe brought some big changes to the Raw Processor. I wasn’t expecting any updates until I was going to show a class how to do a particular correction and found my instructor computer had automatically updated.
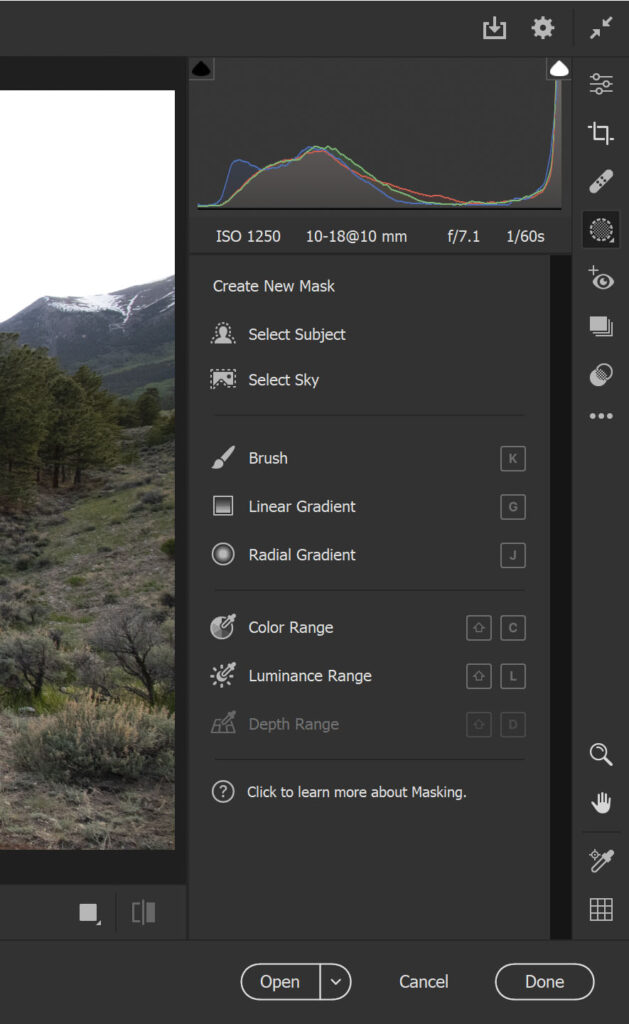
The most significant changes came in the new tools for masking and adjusting your images. The added features are similar to features already in Lightroom, and make fine tuning your images much easier. Visually in the app you can now see the masks you create like you can in Photoshop. There are also two new tools for automatically selecting objects or skies. In my class it took me a few minutes to figure out these changes, and the online information by Adobe was helpful too.
The two newest options are for automatically selecting your subject and for selecting the sky to create masks you can apply changes. To select a subject you draw a rectangle around your subject and the program will create a selection of what it believes to be the main subject. This works well if your subject has some contrast against the background. If it doesn’t make a great selection the first time you can create a second mask to add or subtract from the first.
The select sky feature will select the sky with one click. It does pretty good with trees and limbs and tries to feather the selection around these objects. The unique way the masking works allows you to not only apply an overall correction to the sky, but it will let you create a second mask using the linear gradient to apply within the sky mask.
There are shortcut keys for each of the masking options, for the brush, G for linear gradient, J for radial gradient, C for color range, L for luminance, and D for depth range. These shortcuts will make creating multiple masks quick.

For the moment the masking is taking a little bit more time, but the increased flexibility with being able to see the masks will pay off in the end. Another feature is the ability to change how the mask is displayed. It reminds me of the display option when masking in Photoshop. The white on black is a great option to truly see the mask clearly.
I seem to ffnd new ways to use the raw processor to improve my images each time I go in to do more editing. As I find these hidden gems I’ll let you know.